Recently, RollerAds has released a new feature — the campaign presets. This tool enables you to pick the most optimal campaign settings across almost every GEO and vertical we work with. This way, you can save your time on campaign setting up and optimization. And in order to demonstrate you how the feature works, we have prepared a case study for you. Visit RollerAds recent post to learn more about the presets, alongside other updates, or read on the article to see the feature put to practice.
Picking the Offer
Prior to describing what is preset and how it works, we need to define the context and tell you about the offer, which was selected for the explanatory purpose. We decided to go for TotalAV offer from CpaRoll network and the reason lies in its lucrative metrics — some of them were known before the campaign, others were revealed after obtaining the results:
- Budget: $200/daily
- GEO: US
- Bid size: $1 (upper threshold)
- Cost per Lead: $2–3
- Return on Investment (ROI): 57%
Where could you use presets? In a social network survey offer, just like we have it in a separate case study.
Definition of Presets
Presets are a decent alternative to classic campaign creation. They are divided into categories and can be filtered by vertical and GEO.

A veritable lifesaver is the ability to test several sources simultaneously and exclude the underperforming ones.
Starting a Campaign
Business as usual, follow these bold bullet-points:
- Create a campaign
- Select push notifications
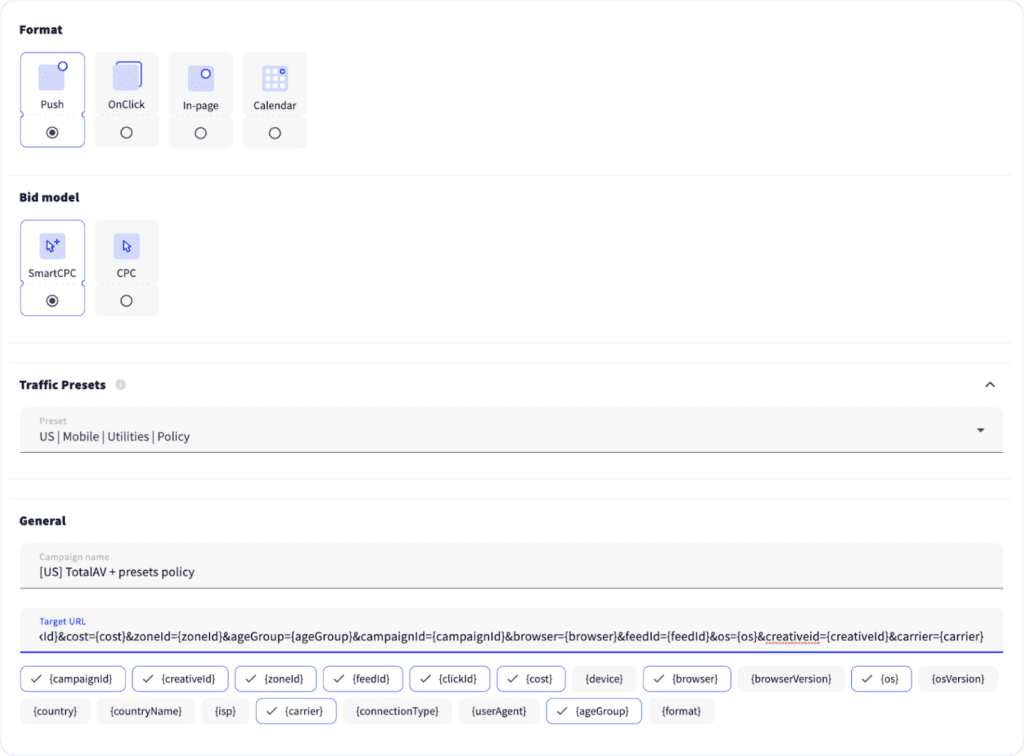
- Choose the bidding model you prefer
Regarding the bid model for this case, you can decide between CPC and SmartCPC. The former is a fixed bid for every source, while the latter relies on AI to adjust the bidding size within a certain budget span.
- Pick the right preset
We had an offer from the TotalAV advertiser, who prohibits using scary creatives. Which is why our preset of choice was “US | Mobile | Utilities | Policy”.
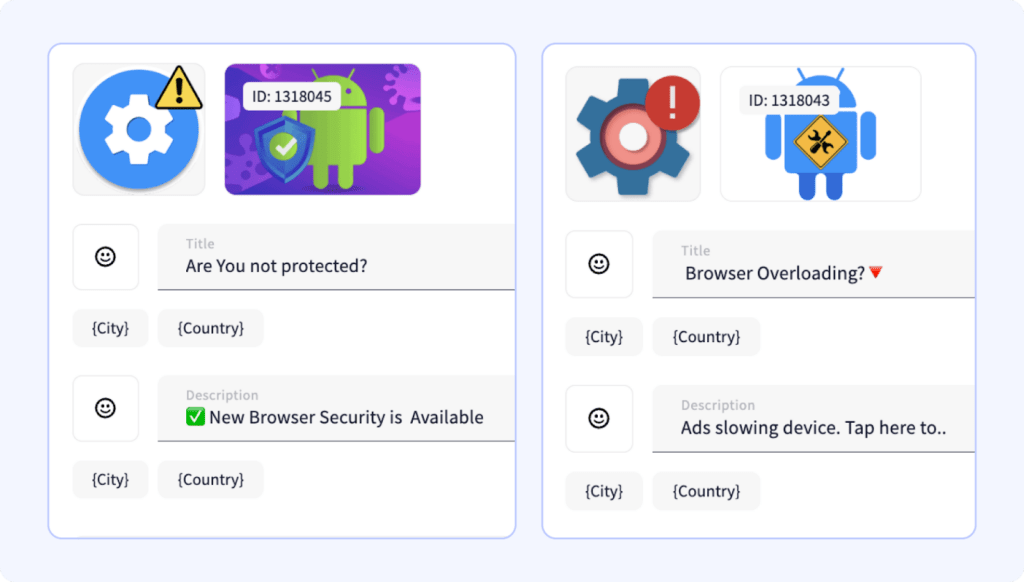
- Add the creatives
Here are some examples that work well, at least for the TotalAV campaign.
- Choose your GEO
TotalAV is a multigeo offer, but we decided to go for the US. Adjusting the regions, providers, IP addresses etc. is not required — leave these settings to default.
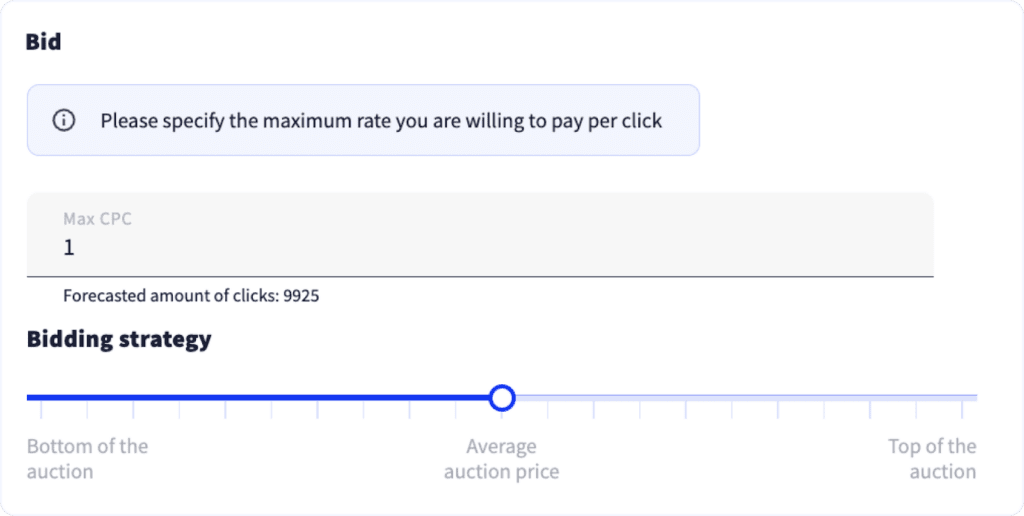
- Input the desirable bid
This step will depend on the bidding model chosen beforehand. When running classic CPC, you may want to ask your manager about average bids. In case of SmartCPC, the system will bid averagely automatically. We went for the latter alternative, so we only had to specify the top threshold beyond which the bidding algorithm cannot go. The bid of $1 was chosen, since the traffic will cost us the average price per zone anyway.
- Limit your daily budget
In order not to flush all the budget down the drain while trying out new tools, limit your daily spending. Our daily budget was limited to $200, as you can see in the picture below.

- Narrow down your targeting settings
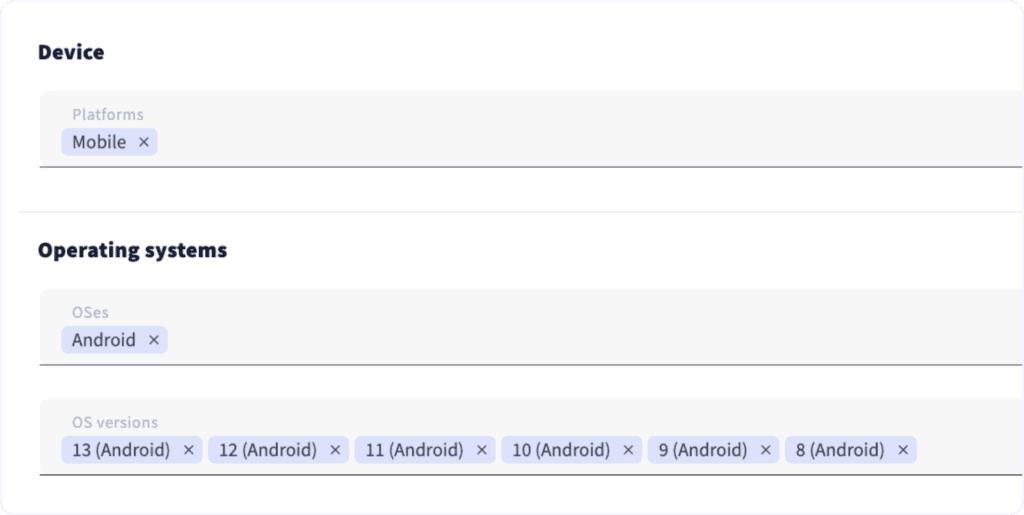
The final step is to set up targeting. Pretty straightforward here — rake in all the devices, allowed by the offer conditions.
At the End of the Day…
As you can see below, save for a few days, the campaign launched profitably. A couple of zones were far from satisfying, but after a bit of optimization, the campaign went uphill and started to gain momentum. Specifically, we made a whitelist and blacklist, plus adjusted our bidding strategy. The screenshot also demonstrates moderate traffic volume, caused by the daily budget limit; but since all the zones convert well, the ROI was good. We’d like to remind you that there was minimum optimization made to the campaign.

57% ROI is not as good as x2 ROI per month for advertising shoes, but these are just different approaches. Also, we recommend you to take a look at a case study by the Moonstar Network featuring a 95% ROI.

